How to use multiband saturation on drums, bass, vocals and the master bus
Where to put the crossovers, how hard to drive each band and when to blend in parallel: multiband saturation starting points for every source.
By CrystalKarat12 min read
Multiband saturation is the most precise colour you can add to a mix, and the easiest to get subtly wrong. The bands are only as good as where you put them, the drive only as good as your level-matching, and the blend only as good as the plugin’s phase. This guide gives a workflow that works on any source, then concrete starting points for drums, bass, vocals, instruments and the master bus. Every number is a place to start listening from, not a rule.
If you haven’t chosen a plugin yet, our comparison of multiband saturators explains what to look for.
The workflow that works on everything
- Gain-stage into it. Saturation depends on level, so the same setting does different things to a quiet and a loud track. Many analog-voiced plugins are calibrated so that an average of around −18 dBFS is their sweet spot; set your input there before you judge.
- Put crossovers in the valleys. Look at an analyser and find the dips between the source’s main areas of energy. A crossover through a kick’s fundamental or a vocal’s body splits one sound between two bands with different distortion, and smears it. Round numbers like 100 Hz or 1 kHz are only where to start looking.
- Choose slopes for the job. 12 dB/oct blends bands smoothly for tonal colour. 24 or 48 dB/oct isolates a band, which is what you want under a bass you plan to distort.
- Drive one band at a time. Solo it, raise the drive until it is clearly too much, then back off by a third. Use delta (wet minus dry) to hear exactly what the band adds.
- Level-match each band, then the whole. Otherwise the band you drove hardest wins by being loudest.
- Blend. Parallel saturation keeps the dry transients and adds the harmonics underneath. Use the plugin’s own Mix control, which should be phase-matched, rather than a parallel channel.
- Check it. In mono, at low volume, on small speakers, and bypassed at matched loudness. Then raise oversampling for the bounce.
Drum bus and kick
Drums are where multiband saturation earns its keep: one band can add weight to the kick, another crack to the snare, another sheen to the cymbals, each without driving the others.
| Band | Start around | Character and drive |
|---|---|---|
| Low (kick weight) | below 100–120 Hz | Transformer or warm tape, light: harmonics that make the kick read on small speakers |
| Body | 120 Hz–1.5 kHz | Tape or tube, moderate; this is the snare’s body and the room |
| Crack | 1.5–6 kHz | Clean tape, or amp for aggression; sharpen transients before the shaper |
| Air | above 6–8 kHz | Clean tape or soft clip, low drive, 20 to 40% mix for shimmer without wash |
Saturation flattens transients, so drums lose punch if you only drive harder. Sharpen the transients before the shaper (Forge’s per-band Dynamics does this), or blend in parallel so the dry attack survives. For a parallel smash, drive one band hard, or switch it to hard distortion or bit crushing, and bring the mix down to 10 to 25%.
On a kick alone, keep the very bottom (below about 50 Hz) clean, saturate the band above it for harmonics of the fundamental, and add a touch of hard clip on the beater’s click, usually between 2 and 5 kHz.
Bass and 808s
The rule is simple: keep the sub clean, distort above it. Saturating the sub eats headroom and blurs the note; saturating the band above it creates the harmonics that let a bass line read on a phone.
- Sub, below 80–120 Hz: no saturation, or a sub passthrough that keeps it bone dry and phase-aligned. Keep it mono.
- Growl, 120–500 Hz: tube or transformer, moderate drive. Bias up for more even harmonics without more distortion.
- Grit, 500 Hz–3 kHz: amp or soft distortion for edge, as much as the track wants.
- Fizz, above 3 kHz: usually turned down or low-passed rather than driven.
Compress before saturating so every note produces the same amount of harmonics. With 808s that glide, the fundamental moves: put the lowest crossover above the highest note’s fundamental, or use a gentler slope so the hand-off between bands is smooth.
If the kick and bass fight, duck only the bass’s low band from the kick with a per-band sidechain, so the growl keeps playing through the hit. It is cleaner than ducking the whole bass.
Vocals
Vocals reward the lightest touch. De-ess first: saturation multiplies sibilance, and a de-esser after it has to work much harder.
- Below 150–200 Hz: leave it, or let it go; there is little but rumble and proximity there.
- Body, 200 Hz–1 kHz: light tape for density. This is also where mud lives, so go easy.
- Presence, 1–5 kHz: tube with a little bias, low drive. Your ear is most sensitive here, so a little goes a long way.
- Air, above 5–6 kHz: clean tape or tube in parallel, 20 to 40% mix, for sheen. Listen for spitty esses and back off if they appear.
If a vocal is harsh in the 2.5 to 5 kHz region, a soft clip on that band at low drive works as a gentle, fast limiter rather than adding colour. Automate the presence band’s drive up in choruses for lift.
Guitars, keys and synths
Electric guitar
Keep the lows clean and drive the mids. Overdrive pedals such as the Tube Screamer tighten high-gain tones by trimming bass before the clipping and peaking in the mids around 700 Hz; a multiband saturator can do the same with an amp character on a band from roughly 500 Hz to 3 kHz and the low band left nearly dry.
Keys and electric piano
Tube on the low-mids, roughly 200 to 800 Hz, brings out the bark of a Rhodes; clean tape on the top keeps it from going brittle.
Synths and pads
Light tape across the whole sound for glue, but keep the low band gentle so pads don’t fill the low-mids. In Mid/Side, saturate and widen the highs of the sides while keeping the lows centred and clean. For leads, drive the mids and let the filter shape the harmonics; see the distortion guide for heavier moves.
Mix bus and mastering
On a finished mix, multiband saturation is about density, not colour. If a master needs heavy saturation, the fix belongs in the mix.
- Aim for barely there: well under 1% distortion per band, gentle 12 dB/oct crossovers, and 4× oversampling or more.
- Leave the sub alone, ideally with a sub passthrough, and keep it mono.
- Add density to the low-mids and mids with clean tape, and a little excitement to the top with tube in parallel.
- Use Mid/Side to saturate the centre (vocal, kick, snare, bass) a touch more than the sides, or to add sheen to the sides only for width.
- Saturate before the limiter. A saturator that has already rounded the peaks leaves the limiter less to do, and it sounds less squashed.
- Compare at matched loudness with a LUFS meter. Mastering is where loudness bias costs the most.
Six mistakes to avoid
- Judging by loudness. Level-match every comparison, or the hottest band always wins.
- Crossovers through fundamentals. Find the valley; don’t split the note.
- Saturating the sub. It costs headroom and focus for no audible gain.
- Too many bands. Three or four cover most sources. Add a band only when a register needs different treatment from its neighbours.
- Blending on a parallel channel. A DAW parallel bus doesn’t share the plugin’s crossover phase, so it combs. Use the plugin’s Mix.
- Hard curves on bright bands at 1×. That is where aliasing lives. Raise oversampling, or use a softer curve on the top band. Our explainer on aliasing covers why.
Plugins for the job
01Forgeby CrystalKarat
Multiband saturatorBest for: Getting every setting in this guide from four seconds of audio
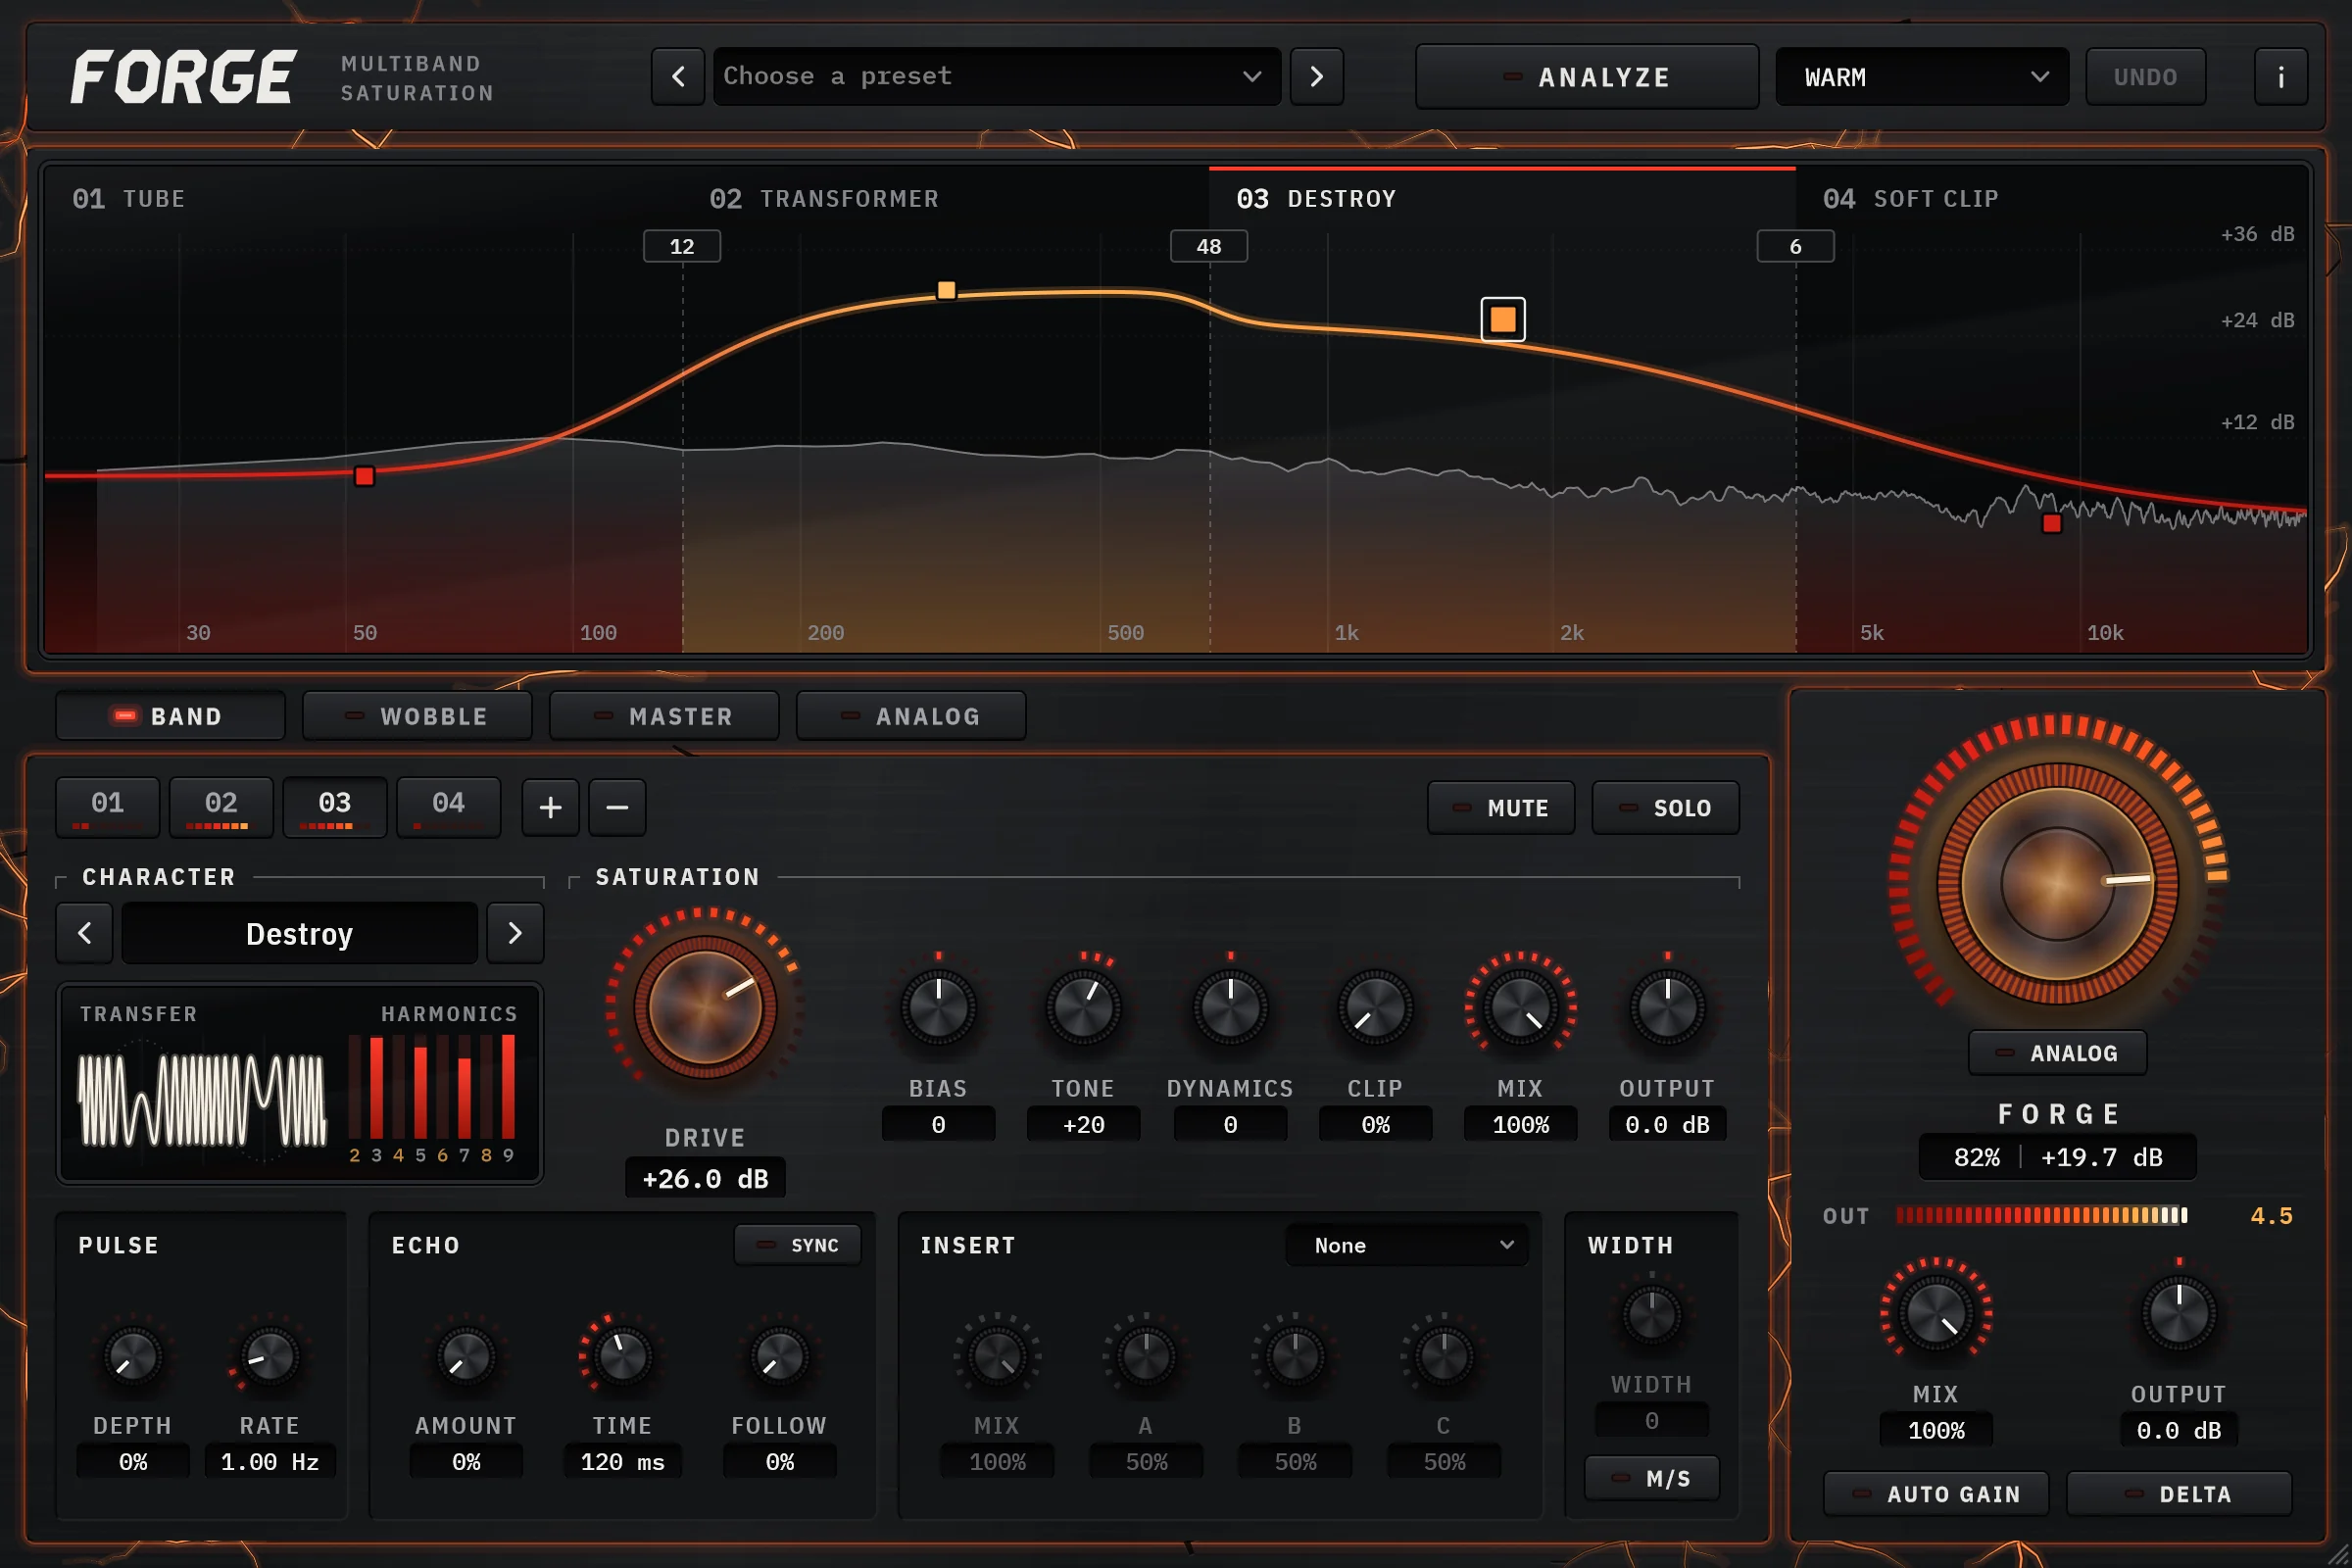
Everything in this guide starts with the same chores: find the valleys in the spectrum, put crossovers in them, choose slopes, set each band’s drive to the right amount, and level-match. Forge’s Analyze does all of it from four seconds of the track you are working on. Its six targets map onto the recipes here: Punch for drums (iron and clean tape with sharpened transients, blended in parallel on the attack bands), Warm for bass and keys, Air for vocals (biased valve on the presence and air in parallel, everything below the mids left dry), Grit for guitars and attitude, Crush for heavy distortion over a solid sub, and Master for finished mixes (0.3 to 0.6% distortion per band, 12 dB/oct crossovers and 4× oversampling).
Then every band has the tools the recipes call for: per-band dynamics to soften or sharpen transients before the shaper, Bias for even harmonics, Mid/Side with per-band width, a sub passthrough, band-by-band sidechain ducking, solo, mute and delta.
Why pick it
- Analyze does the setup in this guide, calibrated to your material
- Per-band dynamics before the shaper protect transients
- Per-band sidechain: duck only the bass’s low band from the kick
- One-step Undo of everything Analyze changed
Know first
- No AAX for Pro Tools yet
- Up to six bands, which is enough for all of the below
- Price
- $49 once, or by subscription · 7-day trial, no card
- Formats
- Windows VST3 · macOS VST3 and AU
Forge is ours: CrystalKarat makes it and publishes this blog. Everything else on this list is another company's, and nobody paid to be on it.
02Saturn 2by FabFilter
Multiband distortion and saturationBest for: Doing all of this by hand, with modulation
Every recipe here works in Saturn 2: six bands, per-crossover slopes, per-band dynamics and Mid/Side. You place and calibrate each band yourself, and you can modulate any of it.
Why pick it
- Complete control
- Envelope followers for level-dependent drive
Know first
- No automatic starting point
Mid-price · Also sold in FabFilter's bundles
FabFilter's page for Saturn 2 (opens in a new tab)03Ozone Exciterby iZotope
Multiband harmonic exciterBest for: The mastering recipe, inside Ozone
Four bands with a saturation mode, amount and mix on each make Ozone’s Exciter a natural fit for the subtle mix-bus and mastering settings below.
Why pick it
- Subtle by design
- Sits in a mastering chain
Know first
- Ozone only
- Four bands
Part of a suite or DAW · Part of Ozone Standard and Advanced
iZotope's page for Ozone Exciter (opens in a new tab)04bx_saturator V2by Brainworx
Multiband Mid/Side saturationBest for: Mid/Side mastering moves
For saturating the middle of a mix without the sides, or the other way round, with a Mono Maker underneath, bx_saturator V2 is built for exactly the Mid/Side ideas in the mastering section.
Why pick it
- Mid/Side throughout
- Mono Maker for the lows
Know first
- Mastering-focused palette
Mid-price · Sold by Plugin Alliance, often discounted; in its subscriptions
Brainworx's page for bx_saturator V2 (opens in a new tab)05Fireby Wings Music
Multiband distortionBest for: Trying these recipes for free
Fire’s four bands, each with its own distortion type and drive, are enough for the drum, bass and guitar recipes. It is open source, and a good way to learn before you buy.
Why pick it
- Free
- Four bands with their own character
Know first
- Less polished than the paid tools
- Unsigned on macOS
Free · Open source (AGPL-3.0)
Wings Music's page for Fire (opens in a new tab)
Questions
Where should I set the crossovers in a multiband saturator?
In the valleys of the source's spectrum, between its main areas of energy, so that no note or drum hit is split across two bands with different distortion. Typical areas to look are below 100 Hz, around 200 to 300 Hz, around 1 to 2 kHz and around 5 to 8 kHz, but the right point is the dip nearest to those in your material.
Should I use multiband saturation on the master?
It can add density and cohesion, but only at very low drive: well under 1% distortion per band, gentle crossovers, the sub left clean, and oversampling on. If a master needs heavy saturation, that is a mix problem.
How do I saturate bass without losing the low end?
Leave the sub band, below roughly 80 to 120 Hz, clean, and saturate the band above it. That creates harmonics that make the bass audible on small speakers while the sub keeps its weight. Compress before saturating so the harmonics stay consistent.
Is parallel saturation better than inserting it?
Often, for drums and vocals, because the dry signal keeps the transients and the saturated copy adds harmonics underneath. Use the plugin's own Mix control: blending on a separate channel can comb, because the dry signal misses the crossover's phase shifts.